New Batch Commencing May 2024. | Remaining Seats: 1 | New Batch Commencing May 2024. | Remaining Seats: 1 | New Batch Commencing May 2024. | Remaining Seats: 1 | New Batch Commencing May 2024. | Remaining Seats: 1 | New Batch Commencing May 2024. | Remaining Seats: 1 | New Batch Commencing May 2024. | Remaining Seats: 1 | New Batch Commencing May 2024. | Remaining Seats: 1 | New Batch Commencing May 2024. | Remaining Seats: 1 | New Batch Commencing May 2024. | Remaining Seats: 1 | New Batch Commencing May 2024. | Remaining Seats: 1 |
Crypto Cipher Newsroom

How To Make A Lofi Hip Hop Beat: 6 Easy Steps

How To Make A Lofi Hip Hop Beat: 6 Easy Steps

How To Make A Lofi Hip Hop Beat: 6 Easy Steps

Lofi Hip Hop Beat Steps:


Lo-Fi is a type of music where imperfections are introduced into the audio signal deliberately to achieve texture or character. Lo-Fi is an abbreviation for Low Fidelity, so music producers often employ plugins that artificially degrade the audio to give their sound a vinyl quality. In this article we will explore 6 easy steps to compose a lo-fi hip hop beat.


Step 1: Creating the right Chord Progression

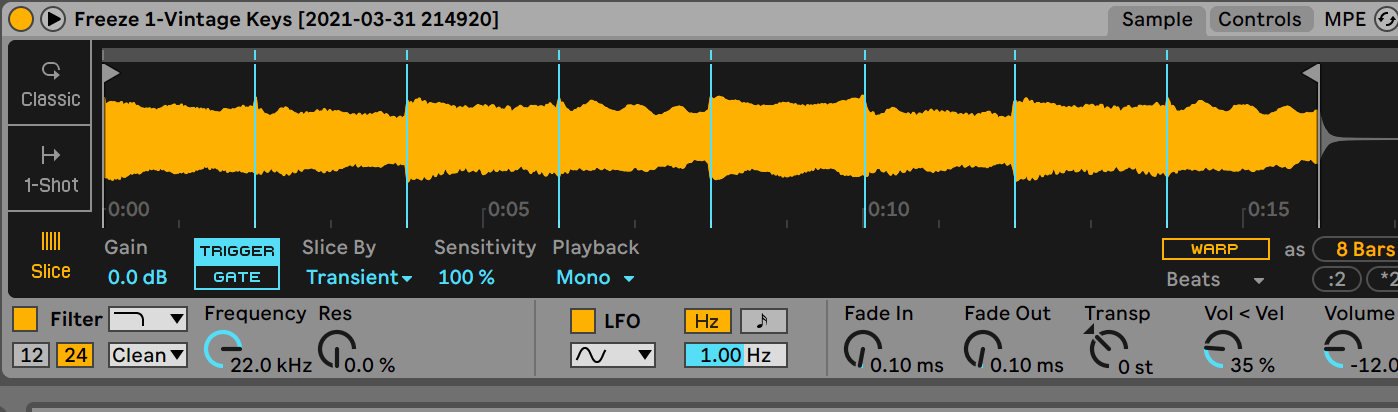
Lofi chords are a huge part of their sonic quality. Most loft producers sample old jazz and soul records to create a nostalgic feeling. We will be creating our own progression from scratch and then we will sample ourselves. Lofi hiphop can be anywhere from from 70-100 BPM, sometimes even slower than that. The BPM for our project will be 75 BPM. For sound selection, try to remember what type of instruments old jazz and soul records would use. Using those sounds to create our sample will help us create a more old timey vibe.


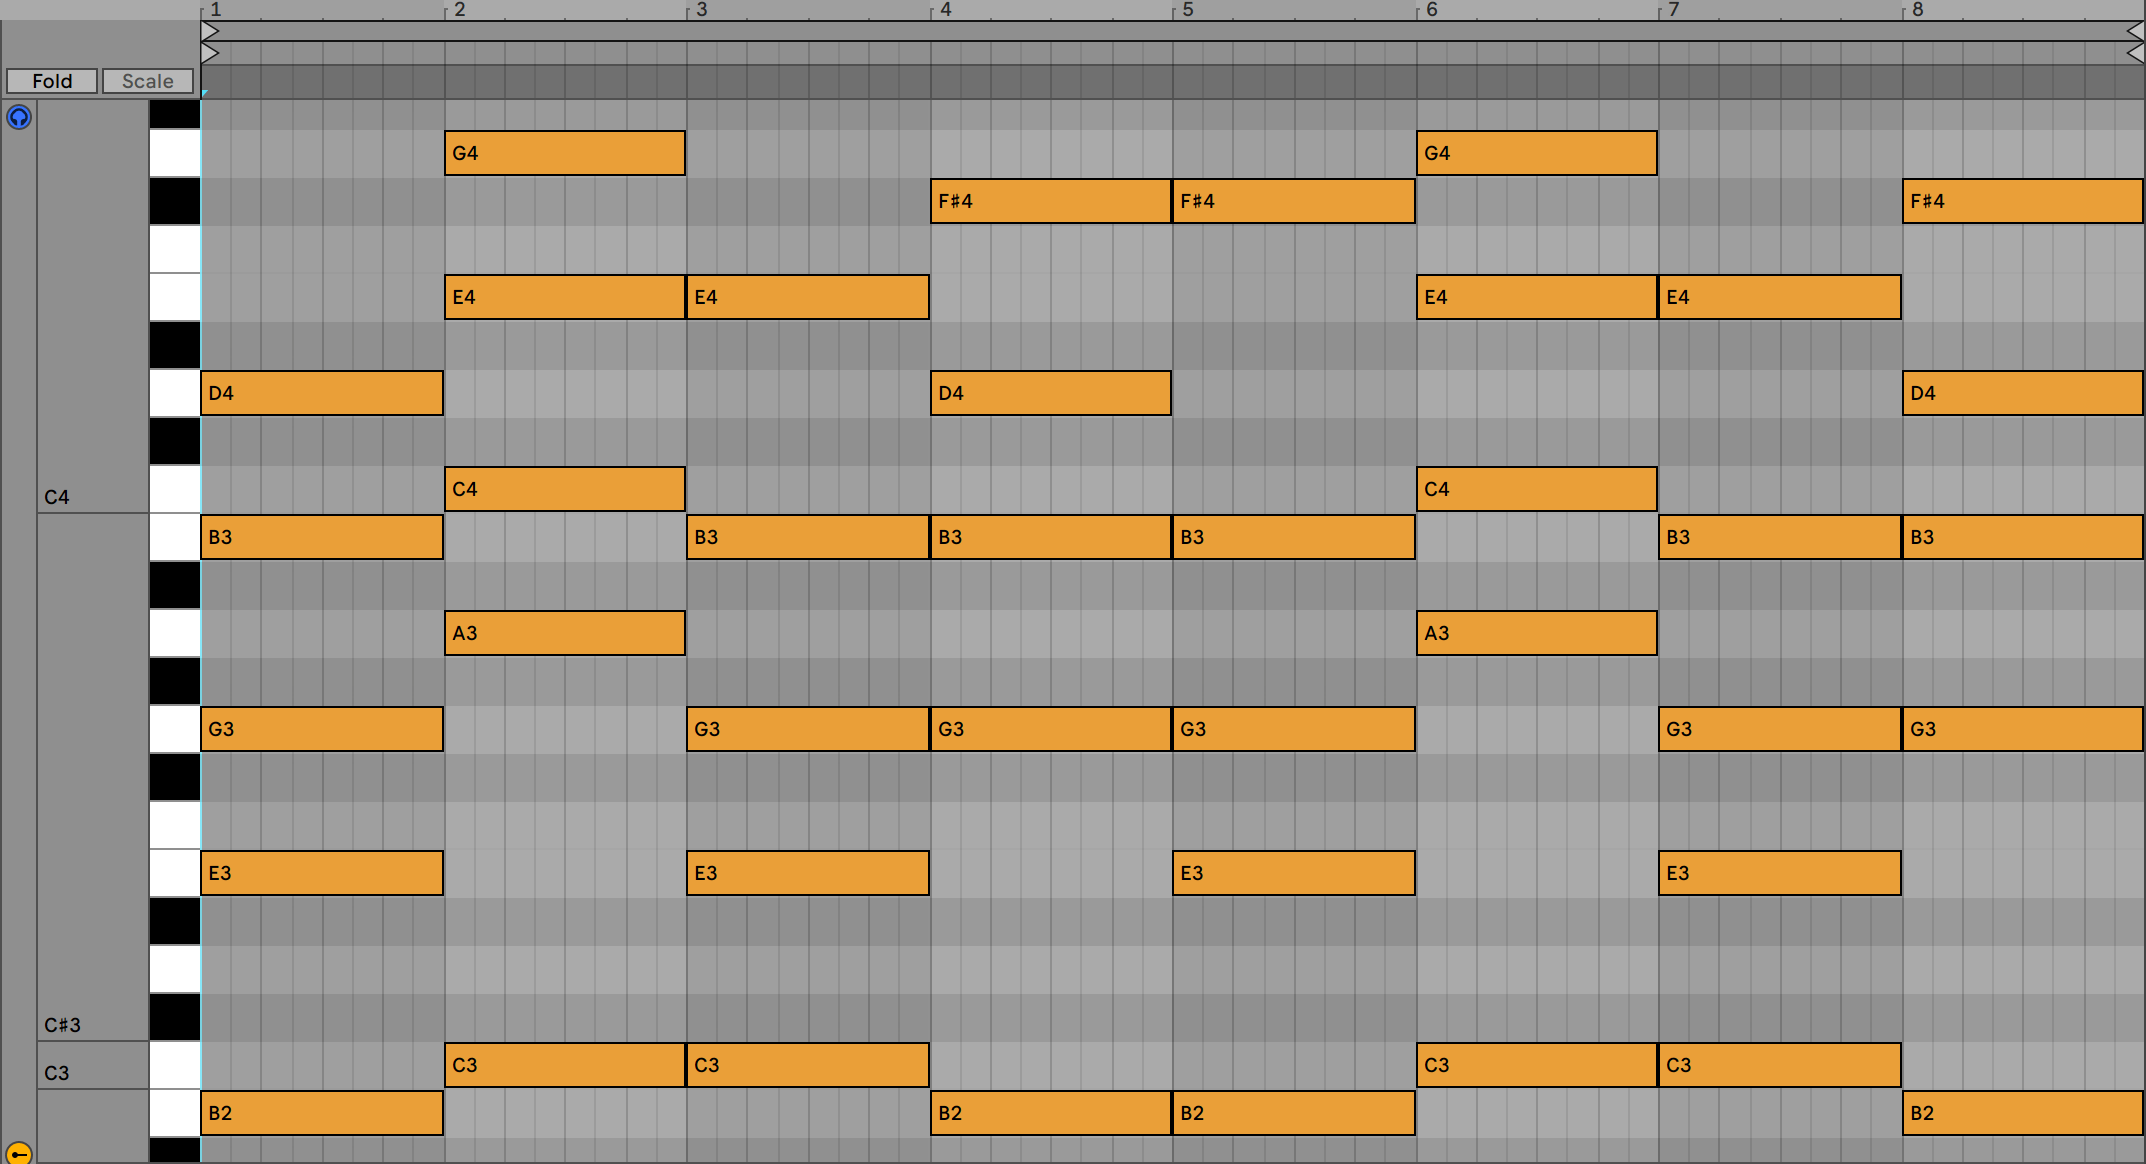
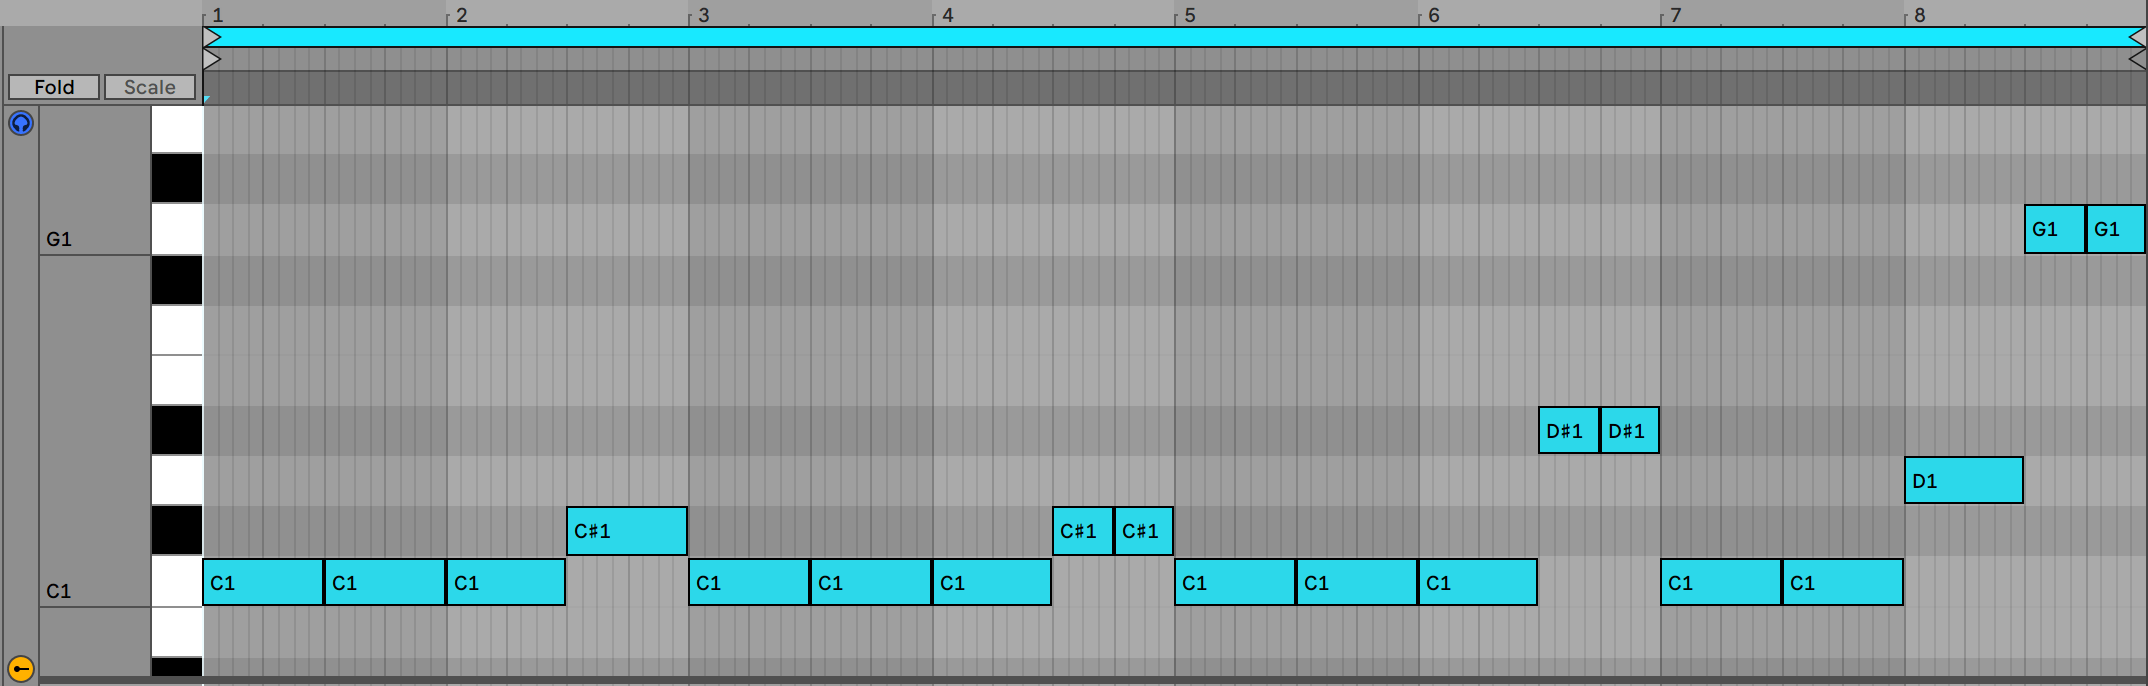
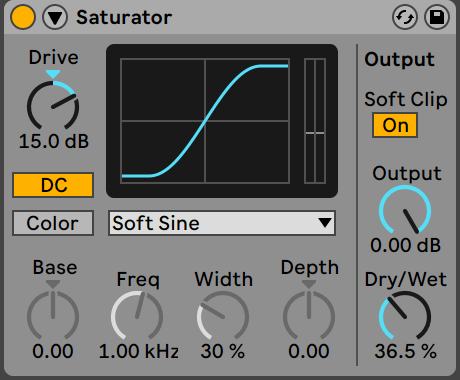
Look at the chords that we have drawn in the image above. We are using a rhoads preset to create these chords. You can use an acoustic guitar or any other instrument but the way you create your chords will change according to that instrument. Here we are using the chords Em7 - Am7 - CM7 - GM7 for the first four bars, in the second four bar cycle, we are substituting Em7 with Emadd9. You can experiment with the added notes on these chords, also use vinyl or modulation fx on the channel to make things sound more aged.


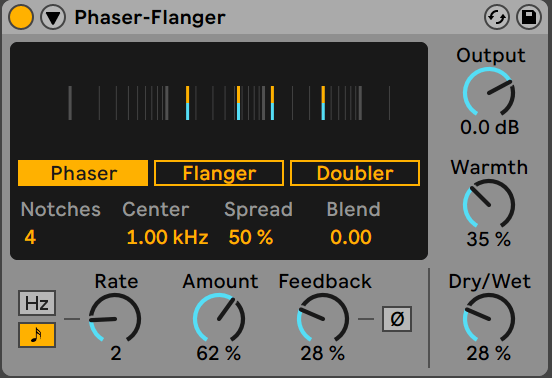
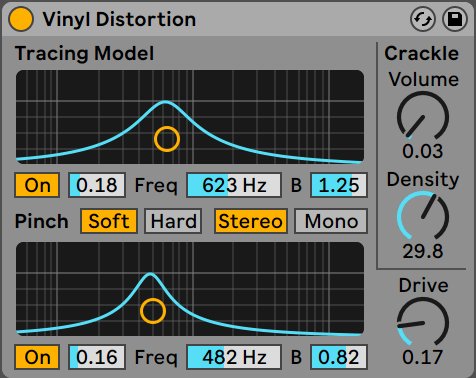
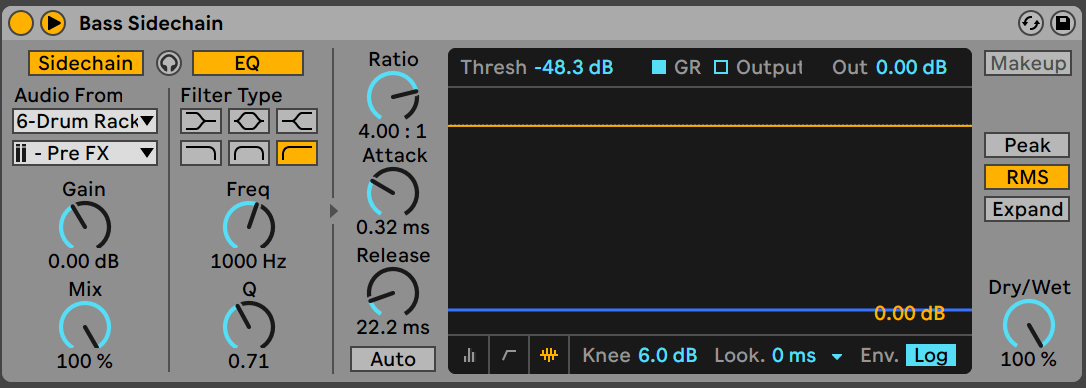
We are using the phaser-flanger device of ableton, as shown in the picture above, to modulate our Rhoads sound.


Step 2: Turning Your Chord Progression Into a Sample

Once you are happy with how your chords are sounding, freeze and flatten them to convert into audio. There are a few ways we can sample this. You can do manual edits in your Daw to create MPC like chops.


In the image above, you can see that we have made quite a few edits to our original sample after freezing and flattening. Have your metronome on for this section as it will help you to flesh out interesting patterns. We are also applying crossfades at clip edges to prevent any clicks and pops. Alternatively, you can add your freeze and flattened sample into a simpler and use the slicing mode to create patterns using midi.


In the image above, we have added our sample into a slicer and then turned on Slicing Mode. You can play around with the sensitivity and slice by settings for different sets of chops. You can now program you sampled melody using midi.


These are the notes we drew in with our piano roll for the simpler. We are going to use this as a variation on the main melody.


Step 3: Drums that sound old

The tone of your drum samples play a huge role in lofi hiphop. The drum programming itself is fairly simple. Go for drum sounds with some audible background noise, You can use some processing to lessen the high frequency response of your drum sounds. We also like to add distortion to our drums to make them sound more crunchy. Once you have your drum sounds selected you can arrange them directly on the track according to our grid, but we will use a drum rack. We are using a kick, snare and hit for our beat.


This is the pattern we have created, shown in the image above. Do not forget to vary the velocities of your hits as required. You can also use some saturation on the drums to fatten them up and add some more character to the sound. You can also experiment with different grooves on your drums, which will offset our midi from the grid, giving the beat more human touch.


We are processing our drums using Ableton's drum buss to add more harmonics and punch to our track.


Step 4: Creating a Groovy Bassline

Bassline in this genre of music is very different from one song to another. Tonally the bass sounds mellow and has much rhythmic variation built into it. Select a preset that has a solid low end with some subtle harmonies in the mids. For the notes in your bassline, you can follow the root notes of the chord, and then develop it further from there. We like to use a lot of octaves and melodic runs to keep things interesting.


As you can see, we have added our bass notes along with some melodic and rhythmic variations. Do not forget to add some processing to your bass if it is too quiet in the mix even when the volume is unchanged. We are using a saturator on our bass channel with the settings shown in the image below.


Step 5: Adding Fx and Foley

Textures are a major part of Lofi sound. The signature vinyl crackle is present on every track to give the listener the perception, that the song is being played from a vinyl record player. We are using a little bit of vinyl distortion on our main sample to simulate the vinyl crackle (image below).


You can also layer your sounds with foley to create more texture along with the vinyl crackle.


As you can see in the image above, the drums that have been programmed with midi is being layered with different foley samples to add depth and character to our drums. Vocal chops and one-shots also spice up your beat in a major way, making it more memorable for the listener. You can sprinkle in some more details with risers and down lifters for transition sections.


As you can see in the image above we added an impact sample and a white noise riser sample for our project. The impacts are placed at the beginning of every 8 bars, while the risers are placed at the 7th bar and 15th bar with varied lengths.


Step 6: Mixing Your Beat

Mixing a lofi beat is fairly easy. Make sure to balance your faders first and then you can experiment with the pan pot. As long as your sound is well balanced in terms of levels and stereo image, you are halfway there. Kicks and Snares need to be able to punch through the mix. Keep the drums as dynamic as possible. Your bass would also be mixed rather loud in the mix. Other instruments and synths can be balanced according to your taste. EQ out any undesirable low frequencies to make space for your bass sound. Getting rid of the lows in your hiatus, cymbals, fx and instruments, will also reduce muddiness of the overall mix. Sidechain compression is also used in this genre often as an aesthetic tool rather than a tool for mixing. You can sidechain various instruments to your kick and exaggerate the sidechain effect to emphasise on the lofi character of your track.


As you can see in the two images provided above, the side chain settings on my melody sidechain and bass sidechain are different. The melody sidechain has more exaggerated and audible sidechain compression happening to create movement in the sound, while the bass side chain is much more focused on attenuating our bass sound whenever the kick strikes without being necessarily heard. You can also experiment with some subtle saturation or soft clipping on you master buss to further drive in that lofi feel of your track.

If you want to follow along with our Ableton project file, then click on the link provided below to download the .alp file: